Create a Handmade Memory Board with Photos and Objects Step-by-Step Guide
The Art of Memory Boards
Creating a handmade memory board is a delightful way to showcase your cherished memories, turning everyday moments into artistic expressions. This DIY project not only allows you to personalize your space but also serves as a creative outlet that can be enjoyed alone or with friends. The process of assembling a memory board fosters a strong connection to your past while adding a unique and decorative touch to your living environment.
Imagine gathering meaningful items such as ticket stubs from concert nights, postcards from your travels, or photos from family gatherings together in a cohesive display that tells your story. This immersive experience grants you the opportunity to reflect on your treasured experiences, allowing nostalgia to fill your space. Here are a few benefits of making your own memory board:
- Customization: You have the freedom to tailor the design to reflect your personality, whether that means opting for a rustic, vintage aesthetic or a bright, modern look. Color schemes, fabric choices, and the arrangement of items can all be dictated by your individual tastes.
- Creativity: Engaging in this fun and artistic process encourages you to tap into your creative side. You can use various techniques, such as collage or decoupage, and incorporate mixed media to create depth and texture.
- Sentiment: Highlighting special moments that matter most to you allows for a display rich in personal significance. Each object you choose can trigger memories and evoke emotions, serving as a daily reminder of the smiles and adventures that have shaped your life.
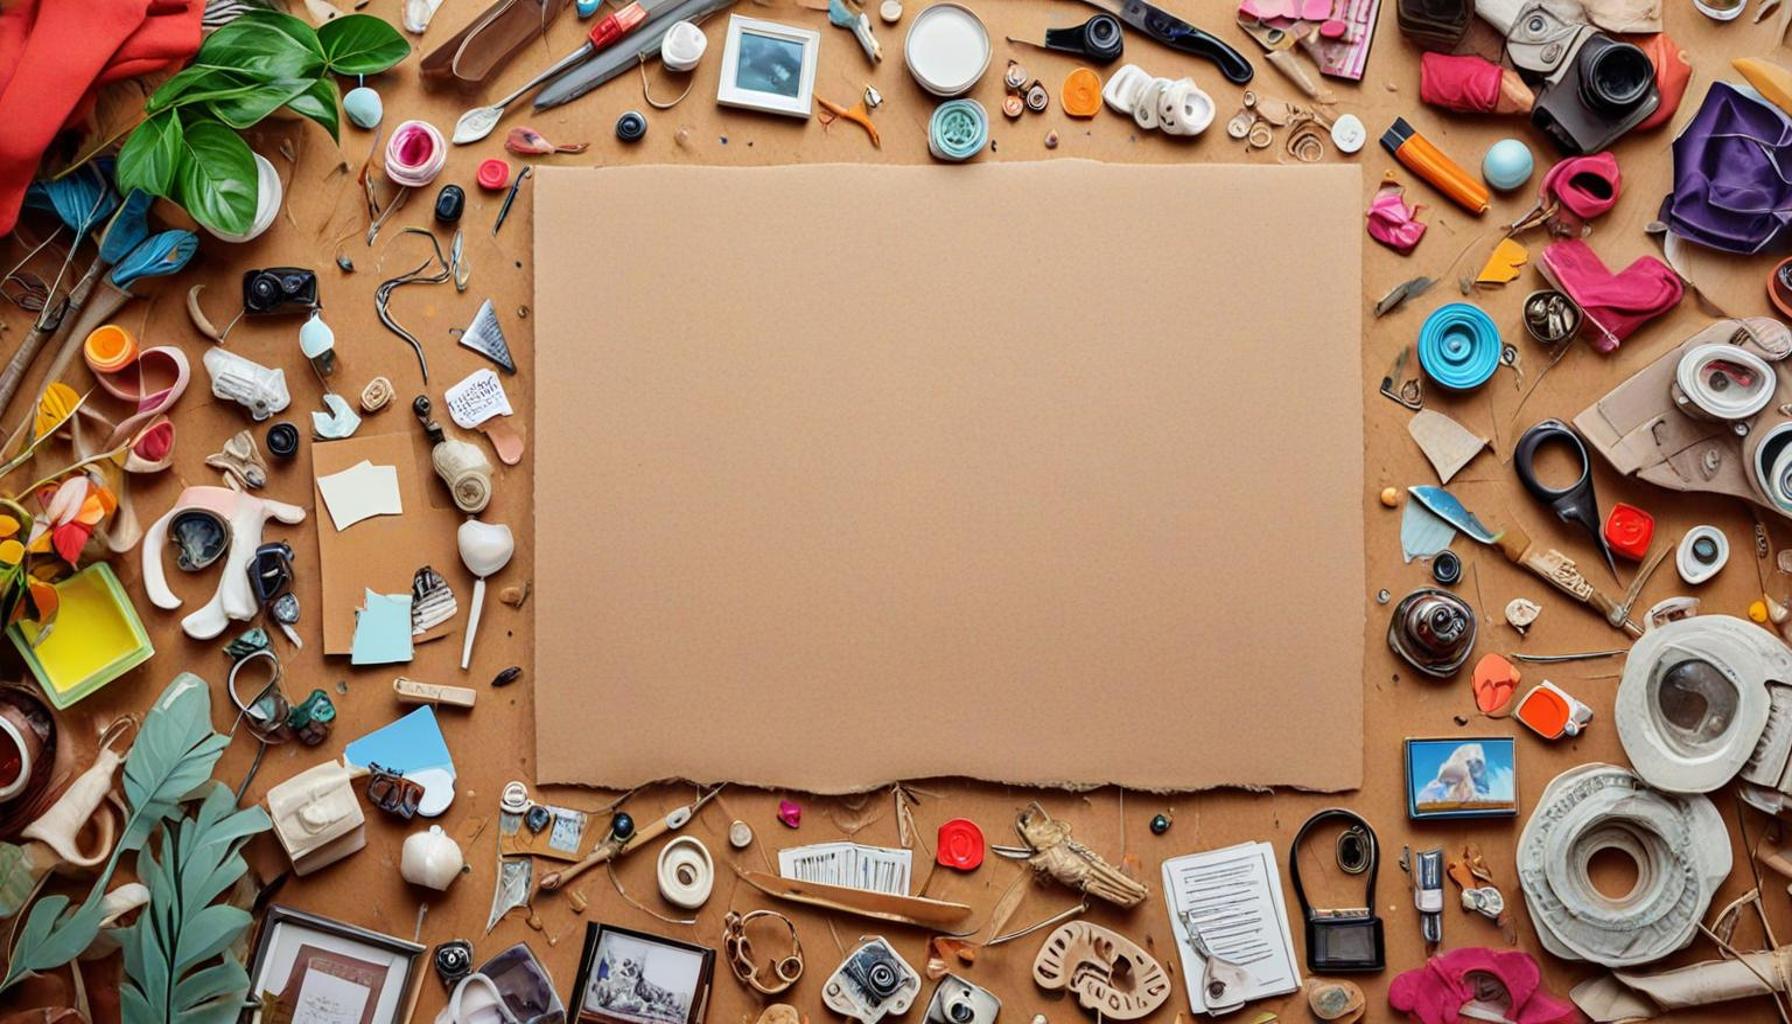
For those eager to embark on this crafting journey, it’s important to consider the essential supplies needed to start your project. Some key materials include a corkboard or canvas base, craft paper, scissors, glue, decorative items like ribbons or stickers, and, of course, your selected photos and memorabilia. You can often find these materials at local craft stores such as Michaels or Joann, which frequently feature seasonal sales and discounts.
In terms of technique, arranging items thoughtfully can significantly impact the final look of your memory board. Grouping similar colors or themes can create a harmonious design, while scattering diverse elements might give a more eclectic vibe. Inspiration can be drawn from platforms such as Pinterest, where countless examples show how others have brought their own memory boards to life.
This guide aims to inspire not only seasoned crafters but also beginners, ensuring that everyone feels encouraged to unleash their creativity. By the end of this process, you won’t just have a stunning display but also a tangible representation of your journey through life. So gather your favorite photos and objects, and let’s embark on the adventure of bringing your memories to life!
CHECK OUT: Click here to explore more
Gathering Your Materials
Before diving into the creative process, it’s essential to gather all necessary materials for your handmade memory board. This will streamline your crafting experience and ensure that you have everything on hand to bring your vision to life. A designated space is also crucial, so you can work comfortably and allow your creativity to flow. Here are the key materials that you will need:
- Corkboard or Canvas: Choose a base that suits your aesthetic and the amount of items you plan to display. Corkboards are versatile and can be easily pinned, while canvases offer a more polished look.
- Fabric or Craft Paper: Consider using fabric to cover your board for a more textured and inviting feel, or choose decorative craft paper for a colorful backdrop that complements your photos.
- Scissors and Glue: A good pair of scissors is indispensable for cutting photos and materials to size. Use strong adhesive glue to ensure your items stay securely attached to your board.
- Decorative Elements: Ribbons, stickers, washi tape, buttons, and other embellishments can add character to your memory board. This is your opportunity to express your creative flair!
- Memorabilia: Gather your favorite photos, ticket stubs, postcards, or any small objects that capture significant moments in your life. Selecting items that have personal meaning will enrich the sentiment of your board.
Once you have assembled your materials, it’s time to think about the design of your memory board. Consider the layout before you start gluing anything down; this step can be critical to the overall unity of your piece. A well-thought-out arrangement can elevate the visual impact of your memory board. Here are a few design techniques to consider:
- Thematic Arrangement: Organize items by theme—such as travel, family, or friendships—to create a compelling narrative that reflects your life’s journey.
- Color Coordination: Group your items by color to create an aesthetically pleasing effect. Choosing a color palette can help unify the various elements and create a harmonious look.
- Layering: Experiment with layering items to add depth and intrigue. Place larger items in the back and smaller ones in the foreground to draw the eye in.
Having a clear idea of your design layout before you start gluing can save you time and frustration. Use this planning phase to visualize how your memory board will look when complete, allowing you to make adjustments as needed. The goal is to create a captivating representation of your treasured memories that also functions as a beautiful piece of art for your living space.
As you proceed to the next phases of assembling your memory board, keep in mind the importance of enjoying the process. This project offers not only a way to commemorate the past but also a chance to express your unique style and personality. Stay tuned as we move to the exciting part of constructing your masterpiece!
| Category | Details |
|---|---|
| Creativity | Crafting a memory board allows endless creative expression, showcasing personal styles and preferences. |
| Sentimental Value | Each photo and object adds emotional depth, turning mere decor into treasured keepsakes. |
| Customization | You can choose themes or colors that match your home decor or reflect significant life events, ensuring the board is uniquely yours. |
Creating a memory board goes beyond mere decoration; it’s about capturing moments of life in a visual narrative. This hands-on project not only organizes your cherished items but also serves as a conversation starter. From vacations to family gatherings, each element can have a story that brings nostalgia every time it’s viewed. By investing time and creativity into your board, you are not only building a piece of art but also a family legacy that can be passed down through generations. Whether you choose to showcase cherished photographs from a trip or mementos from your child’s first day at school, the possibilities are as vast as your memories! Through each step of this step-by-step guide, you will discover how to optimally use various materials and designs to make your memory board not just a display, but a personal journey through your experiences.
SEE ALSO: Click here to read another article
Designing Your Memory Board Layout
Now that you’ve gathered all your materials and established a theme for your memory board, it’s time to dive into the layout design. This is arguably the most creative part of the process, where you can let your imagination run wild. A thoughtfully designed board not only showcases your cherished memories but does so in a way that draws the viewer in. Here are some step-by-step strategies to help you in crafting your board’s layout:
- Start with a Base: Lay out your fabric or craft paper on your corkboard or canvas. If you’re using glue, ensure that it’s evenly spread to prevent air bubbles. As you position your backdrop, think about whether you want the texture of your fabric to complement or contrast with the items you’ll be displaying. A soft, neutral fabric can highlight colorful photos and objects, while bold prints can provide a vibrant foundation.
- Mapping Your Initial Arrangement: Before committing with glue, place your memorabilia on the board without adhering them. This method allows you to experiment creatively. Move items around, overlap them, and try different configurations. Don’t be afraid to step back, take a look, and make adjustments as you see fit. You might find that certain pieces resonate better together than others.
- Focus Points: Consider identifying focal points on your board. Use larger photographs or eye-catching memorabilia as anchors that draw attention. These focal points can serve as conversation starters, making your board not just a personal diary but a story waiting to be told to friends and family.
- Incorporate Text: To narrate your memories, include handwritten notes, quotes, or dates next to your photos or objects. This adds personal touches that provide depth to the visual elements. Consider using decorative letter stickers or even your own handwriting for an authentic feel.
- Balance and Symmetry: Keep in mind the guided principles of balance and symmetry. The distribution of visual weight across your board can affect how it’s perceived. A balanced layout, where items of varying sizes are strategically placed, prevents a cluttered look. If you favor asymmetry, allow larger items to dominate one side while compensating with smaller items on the other.
Once you’re satisfied with the layout, it’s time to move on to the adherence phase. Here are some tips to effectively attach your items:
- Adhesive Application: Apply glue to the back of photos and objects evenly. Too much glue can seep through and mar the appearance of delicate materials. For items that are heavier or bulkier, consider using stronger adhesive solutions or double-sided tape for extra security.
- Layering Techniques: Begin affixing the largest items first, followed by medium-sized items, and lastly the smallest. This layering ensures all aspects are secure and creates a more dynamic and visually interesting layout. Adding dimension through layering enhances the overall aesthetic.
While working, take a moment to relish the memories tied to each item as you secure them to the board. This project becomes not only a crafting endeavor but a therapeutic exercise as you reflect on your past.
Your handmade memory board is taking shape, and the next stage will incorporate some delightful embellishments to add that final touch. Whether you’re channeling your inner artist or simply enjoying a creative afternoon, remember that the objective is to celebrate personal moments in a way that resonates with you and your style.
CHECK OUT: Click here to explore more
Bringing Your Memory Board to Life
In conclusion, creating a handmade memory board is not just a crafting project; it’s an opportunity to celebrate your life’s moments in a truly unique way. As you’ve discovered through this step-by-step guide, the process involves careful planning, creative layout design, and personal touches that resonate with your individual style. Whether you choose to highlight family vacations, milestones, or everyday joys, each element you incorporate enriches the tapestry of your memories.
Reflecting on your creative journey, take pride in how each photograph, note, and object signifies a cherished experience. As you attach these heartfelt items to your board, remember that it serves more than just decorative purpose—it becomes a narrative that invites others into your story and sparks conversations about shared experiences.
Moreover, don’t hesitate to explore various materials and innovative embellishments to breathe even more life into your board. Experimenting with colors, textures, and layouts allows you to tailor every aspect of your memory board, ensuring it mirrors your personality and creative flair. Resources such as local craft stores or online platforms provide endless inspiration and materials tailored to your artistic vision.
By investing time into this meaningful project, not only do you create a stunning visual display, but you also engage in a rewarding activity that can serve as a therapeutic reflection upon your past. As you step back to admire your finished memory board, you may find it evolves alongside you, harboring new memories and stories as time marches on. So gather your materials, unleash your creativity, and let your handmade memory board be a delightful representation of the beautiful moments that make up your journey.
Related posts:
Creative Paper Mache Sculpture Ideas for a Fun DIY Hobby
Exploring Modern Embroidery A Creative Hobby Personal Expression
Artistic Calligraphy Techniques for DIY Cards Projects
Revamp Old Clothes into Fresh Styles with Handmade Customization
Create Custom Handmade Notebooks Perfect Gifts Personal Use
Easy Hoop Embroidery Techniques for Beginners Start Stitching Today

Linda Carter is a writer and creative hobbies expert specializing in crafting, DIY projects, and artistic exploration. With extensive experience helping individuals discover their creative potential and bring their ideas to life, Linda shares her knowledge on our platform. Her goal is to empower readers with practical tips, inspiring ideas, and step-by-step strategies for success in the world of creative hobbies.