Create Creative Lamps DIY with Recycled Materials Guide
Illuminate Your Space with Creativity
Creating unique lamps using recycled materials not only brightens your home but also helps the environment. Engaging in this sustainable practice allows your creativity to shine as you transform everyday items into stunning light fixtures. As we collectively strive for a greener planet, many are stepping forward to embark on their own DIY journeys, illuminating homes in a way that reflects individual style and spirit.
Why Choose DIY Recycled Lamps?
- Eco-Friendly: By giving new life to discarded items, you significantly reduce waste. In the United States alone, millions of tons of waste end up in landfills each year. Crafting lamps from materials that would otherwise be discarded contributes to a reduction in your carbon footprint.
- Cost-Effective: Crafting your own lighting solutions can save you a considerable amount of money. While designer lamps can cost hundreds of dollars, a DIY approach can turn a few dollars’ worth of materials into custom fixtures that are completely unique.
- Personal Touch: With DIY projects, you have the freedom to reflect your personality through your designs. From industrial chic to vintage charm, your creations can embody your taste, making your home a true representation of who you are.
From tin cans to glass jars, the possibilities are endless. For instance, have you ever thought about repurposing an old wine bottle? By simply cutting the bottle and adding a light fixture kit, you can create a stunning table lamp that becomes an excellent conversation piece. Alternatively, wooden pallets provide a rustic backdrop perfect for crafting a sturdy lamp base that can serve as a focal point in your décor.
Consider also using vintage teacups, which can be transformed into quirky pendant lights that add a dash of whimsy to your kitchen. Plastic containers, once deemed useless, can become playful, colorful lamps suitable for children’s rooms. The beauty of DIY is that each object tells a story, conveying both history and creativity.
In this guide, you’ll discover step-by-step instructions to create your own creative lamps. You will not only learn practical DIY techniques but also gain insights into selecting the right materials and tools to ensure safety and aesthetic appeal. Let’s dive deep into how you can transform unused objects into functional art that brings warmth and charm to any room!
CHECK OUT: Click here to explore more
Getting Started with Your DIY Lamp Project
Before immersing yourself in the exciting world of DIY lamp creation, it’s essential to gather the right materials and tools that will lay the foundation for your artistic endeavors. The beauty of using recycled materials is that you can find many items around your home or at local thrift stores. The key to a successful DIY lamp project lies in your ability to envision the potential of everyday objects.
Gathering Materials
Here are a few common recycled materials that are perfect for lamp-making:
- Glass Jars: Mason jars or any old glass containers can serve as unique lamp bases or shades. Their transparency allows light to filter beautifully, creating an inviting ambiance.
- Plastic Bottles: Empty soda or water bottles can be easily transformed into playful lamps. With a bit of cutting and creativity, these bottles can become enchanting light fixtures.
- Wood Scraps: Old wooden pallets or leftover pieces can be repurposed into sturdy lamp bases. Sanding them down can give a rustic look, perfect for that cozy aesthetic.
- Cups and Mugs: Vintage teacups or mismatched mugs can be paired with lamp kits to craft whimsical table or pendant lights.
- Tin Cans: With a little hammering, you can create intricate designs on the surface of tin cans, allowing light to shine through in a beautiful pattern.
Once you have selected your materials, ensure you have the necessary tools at hand. Here’s a quick rundown of what you might need:
- Drill: Essential for making holes in materials like wood or metal for wiring.
- Wire Cutters: These will help you in adjusting the lamp cord to the desired length.
- Screwdriver: For assembling the various components of your lamp.
- Safety Gear: Always wear protective goggles and gloves when working with tools and sharp materials.
Designing Your Lamp
With your materials and tools in place, it’s time to design your lamp. Think about the style you want to achieve: do you prefer a modern, sleek look or something more rustic and vintage? Consider the purpose of the lamp as well—will it serve as a reading light, bedside lamp, or statement piece? Sketching out your ideas can be extremely helpful, allowing you to visualize how the final product will look.
Moreover, don’t hesitate to explore various lamp designs from online platforms like Pinterest or YouTube for inspiration. Many creators are sharing their innovative approaches to DIY lighting, making it easier for you to draw ideas that resonate with your personal style. Remember, the goal is to craft something that not only lights up your space but also tells a story through its creation. Let your imagination run wild and prepare for an enlightening DIY adventure!
| Advantage | Description |
|---|---|
| Sustainability | Utilizing recycled materials significantly reduces waste, contributing to environmental protection and promoting a more sustainable lifestyle. |
| Creativity | Creating lamps from assorted materials unleashes imagination and offers a unique way to personalize home decor, resulting in one-of-a-kind pieces. |
Exploring the world of DIY lamps made from recycled materials opens up a realm of possibilities for both eco-conscious individuals and art enthusiasts. The first advantage, sustainability, is of utmost importance. As our society becomes increasingly aware of the need for environmental conservation, projects that emphasize recycling and repurposing can serve as a statement of values, encouraging both yourself and those around you to consider their ecological impact. Moreover, letting your creativity flow by experimenting with different materials not only results in stunning lamps but also allows you to tap into your artistic side. Each lamp you create can become a conversation starter or a fascinating focal point in your living space, showcasing how art can emerge from what might be otherwise discarded. Through this exciting journey, you will discover new techniques, ideas, and perhaps even inspiration for future creations, reinforcing the endless potential of sustainable living enriched with creativity.
SEE ALSO: Click here to read another article
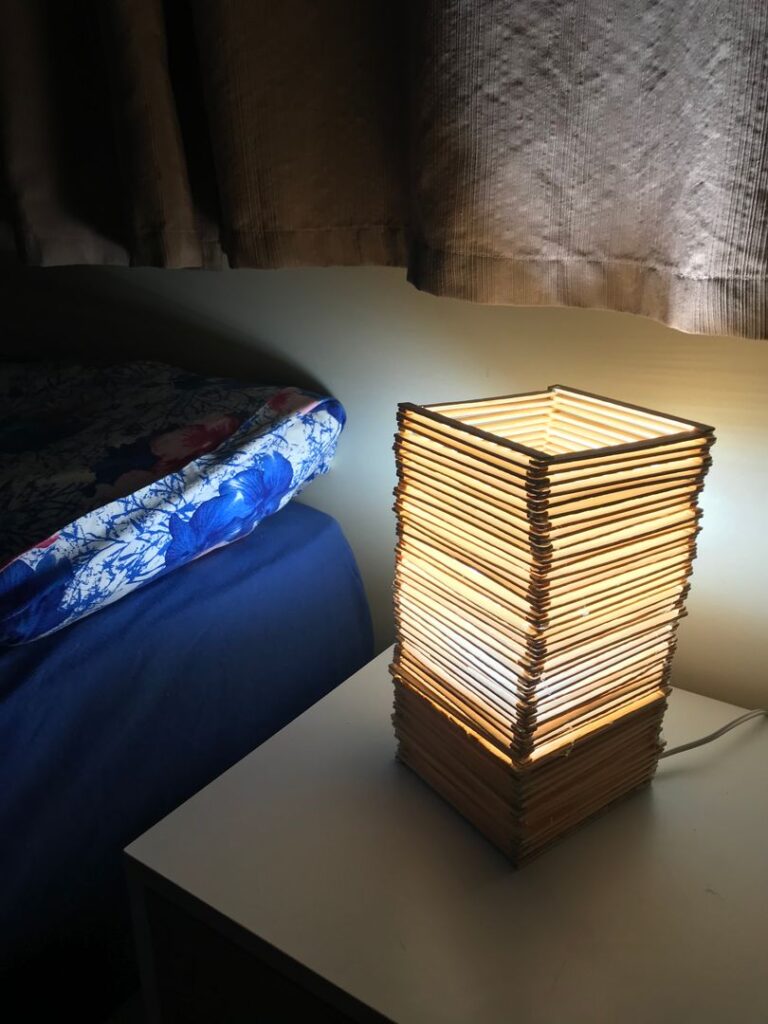
Bringing Your DIY Lamp to Life
Now that you have your materials, tools, and design in mind, it’s time to let your creativity shine and begin the actual construction of your lamp. Every aspect of your creation will add a unique touch, allowing you to personalize your project to your taste. Here are the steps and techniques to help you along the way.
Step-by-Step Assembly
Follow these steps to assemble your recycled lamp, ensuring safety and adherence to electrical standards:
- Preparing the Base: Start with your chosen base material, whether it’s wood or a glass jar. If you’re using wood, sand down any rough edges to avoid splinters. For glass or plastic, make sure it is clean and dry to promote proper adhesion with other components.
- Creating a Lamp Hole: Depending on the lamp kit you have, drill a hole in your lamp base. This hole is where the wiring will go through. If working with glass, consider using a diamond-tipped drill bit to create a clean hole.
- Wiring the Lamp: Carefully follow the instructions provided with your lamp kit to wire the light bulb socket. Strip the ends of the electrical wires attached to the socket and securely connect them to the lamp’s main wiring. Ensure the connections are tight and insulated with electrical tape to avoid short circuits.
- Securing the Shade: If your design incorporates a shade (like a glass jar or an inverted cup), secure it firmly on top of the lamp base. Depending on your chosen materials, you may use adhesive or screws. Be cautious here—ensure the shade is stable to avoid any accidents.
- Testing Your Lamp: Before finalizing everything, it’s a good idea to test your lamp. Simply plug it in and turn it on to make sure everything works properly. If it doesn’t, recheck your wiring connections.
Adding Personal Touches
Once you have the basics down, it’s time to get creative! This is where you can truly let your personality shine. Consider the following ideas to customize your lamp:
- Decorative Elements: Use paint, fabric scraps, or decorative paper to enhance the appearance of your lamp. For a vintage feel, consider adding lace or burlap.
- Upcycled Art: Think about adding small, upcycled art pieces like broken jewelry, buttons, or nature finds such as pinecones or seashells to create a unique design.
- Color Schemes: Choose a color palette that compliments your existing décor. Bright, bold colors can make a statement, while soft, muted shades offer a calming feel.
Understanding Lighting Options
The type of light bulb you choose can significantly affect the ambiance of your DIY lamp. Consider energy-efficient LED bulbs, which not only consume less electricity but also have a much longer lifespan than traditional incandescent bulbs. They are available in various color temperatures—from warm to cool white—allowing you to create the perfect atmosphere. For added functionality, look for dimmable LED options, which can provide versatility in lighting based on your needs.
Lastly, don’t forget about safety. Make sure your wiring is up to code to prevent any risk of electrical hazards. With a little attention to detail and a commitment to safety, your DIY lamp can bring both beauty and functionality to your space.
As you embark on this creative journey, remember that there are no limits to your creativity. Enjoy the process of building something truly unique and embrace the delightful imperfections that come with handmade projects. Your DIY lamp will not only light your room but will also serve as a symbol of sustainability and innovative design.
CHECK OUT: Click here to explore more
Conclusion: Illuminate with Creativity and Sustainability
In today’s world, creating DIY lamps using recycled materials not only showcases your artistic flair but also promotes sustainable practices that benefit our planet. By transforming everyday items into stunning lighting fixtures, you participate in the global movement towards reducing waste and reusing materials creatively. Throughout this guide, we have explored essential techniques and thoughtful design elements that enhance the aesthetic and functional qualities of your project.
Your journey begins with the careful selection of suitable materials, followed by the energizing process of assembly. Emphasizing safety and personal touches are key components in crafting a lamp that resonates with your unique style. Whether it’s the decorative elements that reflect your personality or the eco-friendly LED bulbs that complement your living space, every detail matters.
Additionally, diving into the world of DIY projects like lamp-making can inspire your creativity and adaptability, encouraging you to look at other household items in a new light. Beyond mere decoration, these lamps serve as conversation starters and symbols of sustainable innovation in your home. They remind us that art and environmental consciousness can go hand-in-hand.
As you conclude this exciting project, remember that the adventure of creating is just as rewarding as the final product. Let your imagination guide you as you continue to explore more avenues in recycling and upcycling. By doing so, you’ll not only enrich your own space but also inspire others to think sustainably.
Related posts:
Create Stunning Clay Decor at Home Without a Kiln Easy DIY Guide
Lettering Techniques for Decorating Frames and Planners
Creative DIY Decor Projects to Transform Small Spaces Effectively
Create a Creative Hobby Corner at Home Step-by-Step Guide
Create Stunning Wall Tapestries DIY Guide Using Hand Loom Weaving
Creative Paper Projects Unique Style Decor Ideas for Your Room

Linda Carter is a writer and creative hobbies expert specializing in crafting, DIY projects, and artistic exploration. With extensive experience helping individuals discover their creative potential and bring their ideas to life, Linda shares her knowledge on our platform. Her goal is to empower readers with practical tips, inspiring ideas, and step-by-step strategies for success in the world of creative hobbies.