Create Stunning Home Murals with Paints Stencils Easy DIY Tips
Transform Your Space with Creative Murals
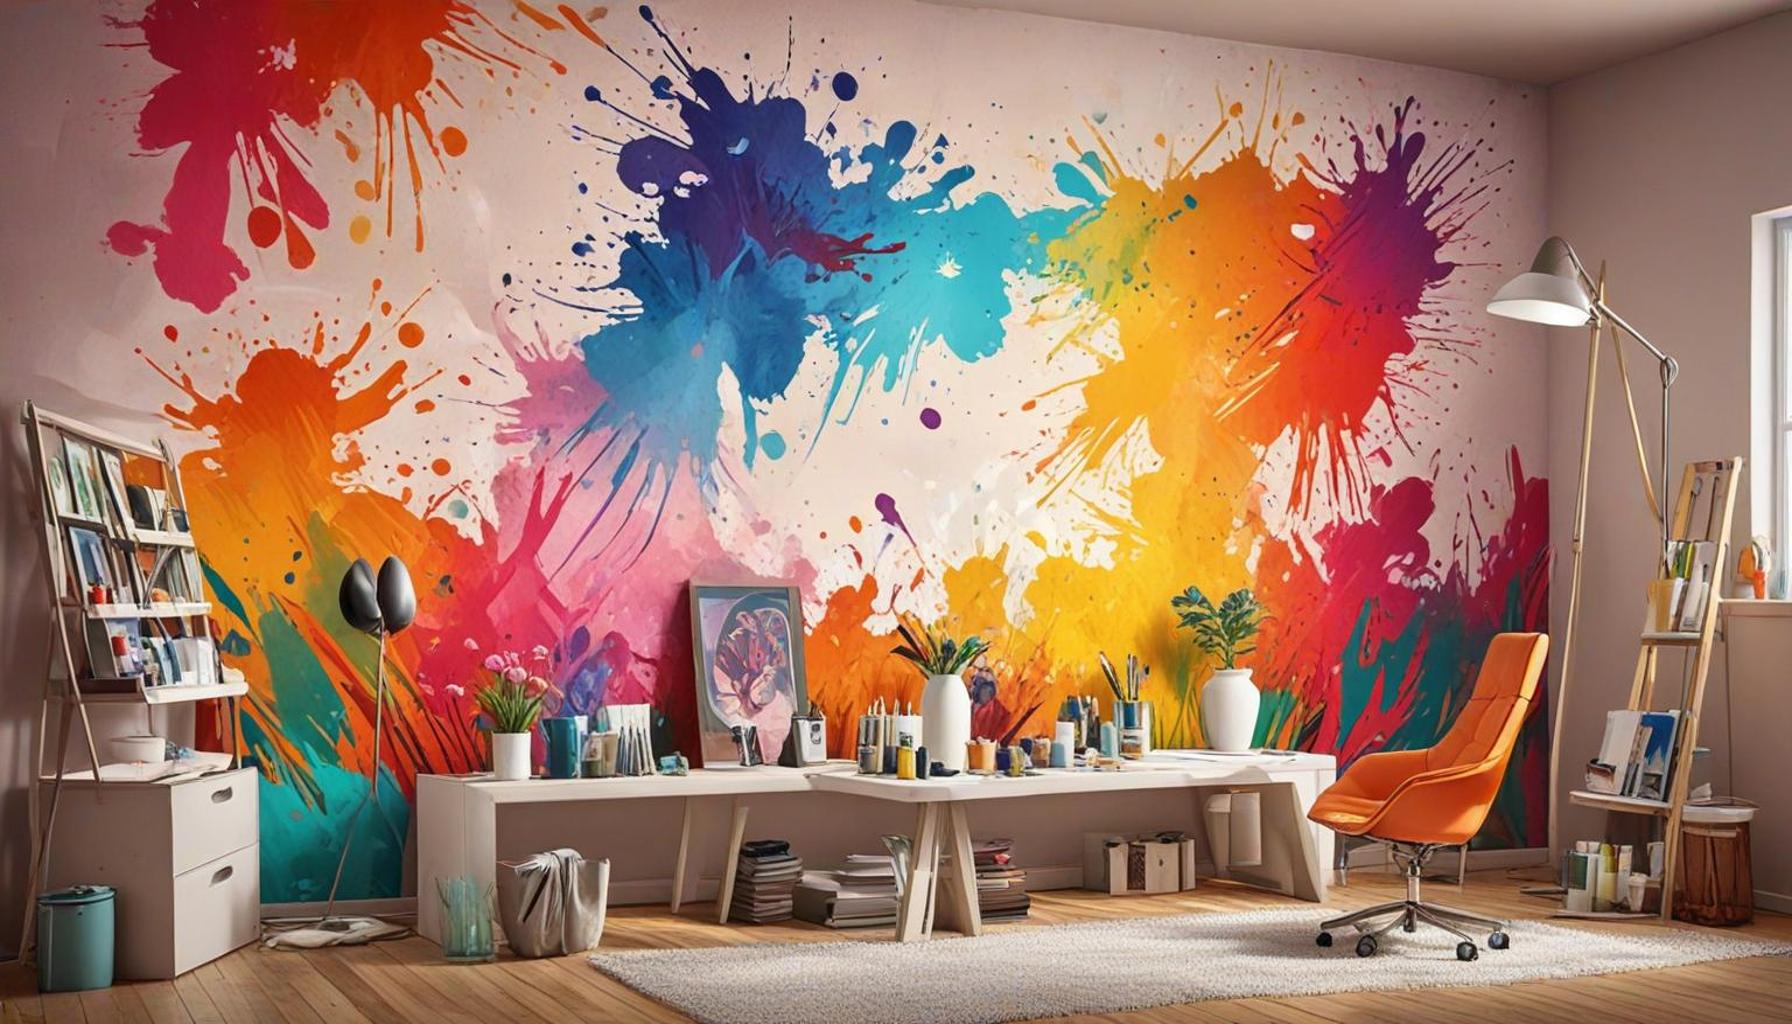
Imagine walking into a room where vibrant colors and intricate designs capture your heart. Home murals offer a unique way to express your personality and creativity, turning ordinary walls into extraordinary art canvases. From bold themes inspired by nature to subtle patterns reminiscent of a favorite childhood memory, the possibilities are endless! Murals can change the feeling of a space, making it more inviting, energetic, or serene, depending on your choice of design.
Why Choose Murals?
- Personalization: Murals provide an incredible opportunity to tailor the design to reflect your interests, culture, or cherished memories. For instance, a mural of a beautiful forest scene can evoke fond memories of a family vacation, while a city skyline could honor your love for urban life.
- Impact: A mural can completely transform the atmosphere of a room. It acts as a focal point that draws the eye and can create a mood—whether it’s a calming beach scene in a bedroom that promotes relaxation or a lively street art-inspired mural in a creative workspace that energizes and motivates.
- Cost-effective: Opting for a mural can be more affordable compared to extensive wallpaper or significant pieces of artwork. You can achieve a standout design without breaking the bank, especially if you choose to embark on a DIY project.
Creating a stunning mural isn’t as daunting as it may seem. With the right tools and a splash of creativity, you can achieve beautiful results on your own. Not only does this approach give you the freedom to determine colors, styles, and themes that resonate with your home’s vibe, but it’s also incredibly rewarding to see your vision come to life.
What You Need to Get Started
- Quality paints: Select colors that speak to you. Consider testing a few swatches on your wall to see how they look at different times of the day under natural light.
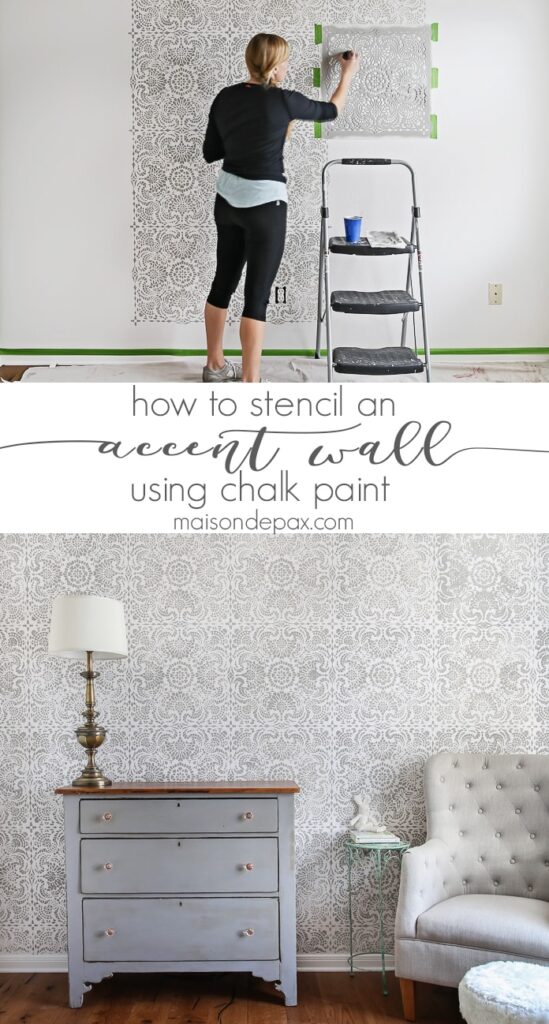
- Stencils: If you’re aiming for precision, stencils can be a game-changer, helping you create intricate designs without the worry of messy lines.
- Tools: Brushes, rollers, and sponges are essential for the application. Each tool can create different textures and effects—experimenting with these can elevate your mural to the next level.
Are you ready to unleash your inner artist? Embrace the world of DIY murals and discover easy tips to guide you through the creative process, step by step. From planning your concept to the final brushstroke, each phase of mural creation brings you closer to transforming your space into a personal gallery of your own. This process not only enhances your environment but can also serve as a wonderful bonding experience with family or friends, making memories together while crafting something beautiful. Don’t hesitate—dive into this enriching adventure and let your creativity shine!
SEE ALSO: Click here to read another article
Planning Your Mural: Concept and Design
Before diving into the actual painting process, it’s essential to lay a solid foundation for your mural project. A well-thought-out concept not only helps streamline your efforts but also ensures that the end result aligns with your vision. Start by gathering inspiration from sources like art books, online platforms such as Pinterest, or even local galleries. Pay attention to color schemes, themes, and styles that resonate with your personality and home aesthetics.
Consider creating a mood board that combines your favorite ideas, colors, and patterns. This visual representation will aid in refining your thoughts and can serve as a reference point throughout the process. As you define your concept, take time to think about the layout. Some essential questions to ponder include:
- What mood do you want to create? Are you aiming for calm and tranquility, or an energetic, uplifting vibe?
- What theme speaks to you? Nature, geometric designs, or perhaps something playful and whimsical for a child’s room?
- How much wall space do you want to cover? A full wall mural will make a bolder statement than a smaller accent design.
Materials to Gather for a Smooth DIY Experience
Once you have a clear vision, it’s time to gather the necessary materials. Investing in quality products can make a considerable difference in the outcome of your mural. Here’s a comprehensive list to get you started:
- High-quality paints: Select non-toxic paints designed for interior walls. Brands like Behr and Sherwin-Williams offer excellent options in a range of colors.
- Stencils and templates: These can simplify complex designs and ensure your lines are clean and professional. You can either purchase stencils or create your own using cardstock.
- Brushes and rollers: A variety of brushes (fine, medium, and broad) will allow you to create different textures. Rollers are great for larger areas, while smaller brushes can help with detailed work.
- Sponges or rags: These tools can be useful for blending colors or creating textured effects.
- Painter’s tape: Essential for creating crisp lines and preventing paint from spreading outside your desired area.
- Drop cloths: Protect your floor and furniture from paint splatters by using drop cloths or old sheets.
- Level and ruler: To ensure your mural is proportionate and straight, it’s essential to measure your space accurately.
With your materials in hand, you are well on your way to embarking on this exciting creative journey. The satisfaction of watching your vision unfold on the wall is unparalleled and can truly enhance your living space. As you prepare to start painting, remember that patience is key—allow each layer to dry properly, and don’t rush the process. Each brushstroke brings you closer to a stunning masterpiece that reflects your unique style!
| Advantages | Details |
|---|---|
| Personalization | Home murals allow you to express your unique style and preferences, transforming mundane walls into personalized canvases that reflect your personality. |
| Cost-Effective Redecoration | Using paints and stencils can significantly reduce the cost of hiring professional painters, making stunning wall art accessible to anyone willing to DIY. |
| Creative Outlet | Creating murals can be an enjoyable creative process that not only beautifies your space but also serves as a fulfilling hobby that enhances mental well-being. |
| Enhancing Space | A mural can make rooms feel larger or cozier, depending on the design, effectively altering the ambiance within your home. |
Creating stunning home murals with paints and stencils is not just about aesthetics; it’s about crafting spaces that tell a story. Beyond the sheer visual appeal, each stroke brings life into your home, offering a canvas for self-expression. Whether you’re looking to revamp a single room or enhance the entire house, these tips empower you to embark on an artistic journey. The flexibility of DIY murals reflects the ideal blend of creativity and practicality, sparking your imagination while keeping your budget intact. By diving into the world of mural-making, you invite color and charm into your living spaces like never before.
CHECK OUT: Click here to explore more
Executing Your Vision: Step-by-Step Painting Process
With a clear concept in mind and all your materials assembled, it’s time to take the plunge into the world of painting stunning home murals. Transforming your walls into vibrant canvases requires a strategy that will not only facilitate smooth execution but also ensure that your artistic intentions are preserved throughout the process. Below, we outline a methodical approach to painting your mural.
Preparing Your Space
Before any paint touches the wall, it’s essential to prepare both your workspace and the wall itself. Start by cleaning the wall thoroughly to remove dust and grease. Next, repair any imperfections, such as holes or cracks, using spackle. Once the surface is smooth, apply a coat of primer—this step is crucial as it allows for better color adhesion and coverage.
Next, protect any furniture or flooring with drop cloths and mask off areas with painter’s tape to achieve clean edges. Your environment should mimic a professional artist’s studio, even if you are working at home.
Sketching Your Design
Before introducing paint to the wall, sketching your design is a valuable step. You can do this directly on the wall using a light pencil or chalk. Alternatively, consider projecting your design onto the wall—a technique that’s becoming increasingly popular for precise imaging. Using projectors, you can enlarge your design to fit the wall’s dimensions while ensuring that proportions are accurate. For those hesitant to draw freehand, stencils come into play here as an excellent tool for refining complex designs.
The Painting Process: Layering and Techniques
When it’s time to paint, start with the background—this will serve as the canvas upon which your main elements will rest. Use a roller to apply the base color and allow it sufficient time to dry thoroughly. Once your background is ready, you can begin layering in your stenciled or freehand designs. Remember, patience is a virtue; it’s advisable to let each layer dry before adding the next to avoid smudging.
- Using Stencils: Secure your stencil with painter’s tape and apply paint using a stencil brush in a dabbing motion. This technique helps avoid paint bleed and ensures crisp edges.
- Freehand Painting: For those feeling adventurous, use fine-tipped brushes to emulate intricate details. Don’t be afraid to experiment with techniques such as sponging or blending to add depth and texture to your mural.
- Color Mixing: Mixing paints can yield stunning results. Consider creating gradients or ombre effects by blending colors directly on the wall for a more vibrant finish.
Finishing Touches and Maintenance
Once you’ve completed the main design, it’s time for the finishing touches. Evaluate your mural from various angles to identify any areas that may need a bit of touching up. When you are satisfied with your work, consider applying a protective topcoat to seal the paint, enhance durability, and make cleaning easier. This is especially crucial in high-traffic areas or homes with children.
Maintaining your mural is just as important as its creation. Regularly dust it off, and if needed, use a damp cloth for cleaning, but always avoid abrasive materials that can damage the paint.
Empowering your living space with a stunning mural is not only an artistic endeavor but also a fun and fulfilling project that can reflect your individual style. Armed with these easy DIY tips, the world of mural painting is truly at your fingertips, inviting you to unleash your creativity.
SEE ALSO: Click here to read another article
Bringing Your Murals to Life
In conclusion, creating stunning home murals with paints and stencils is an exciting opportunity to express your personal style while breathing new life into your living space. By following the structured approach outlined in this article, DIY enthusiasts and novice painters alike can transform their walls into captivating works of art.
The process, from preparing your space to sketching your design, and executing your vision through careful layering and techniques, offers a fulfilling experience for anyone eager to embark on a creative journey. Utilizing stencils not only simplifies complex designs but also adds crispness to each element, allowing your mural to shine. Experimenting with color mixing and layering techniques will elevate your mural, resulting in vibrant visuals that capture the essence of your unique style.
Moreover, the importance of meticulous maintenance should not be overlooked. Regular care will sustain the allure of your mural, ensuring it continues to inspire and delight for years to come. In an age where personalization in home décor is paramount, leveraging the power of mural painting offers a profound way to reflect your personality and artistic ambitions on the walls of your home.
So gather your paints, embrace your creativity, and start your mural project today! With easy DIY tips at your disposal, you are now equipped to make every wall in your home a stunning showcase of imagination and artistry. Dive into this fulfilling venture, and watch as each brushstroke transforms your space into an artistic haven.
Related posts:
Decor with Ropes and Knots Artistic and Functional Design Projects
DIY Decor Projects with Upcycled Wood Creative and Sustainable Ideas
Create a Creative Hobby Corner at Home Step-by-Step Guide
Master Stencil Techniques Personalize Walls Furniture Easily
Create Creative Lamps DIY with Recycled Materials Guide
Create Stunning Wall Tapestries DIY Guide Using Hand Loom Weaving

Linda Carter is a writer and creative hobbies expert specializing in crafting, DIY projects, and artistic exploration. With extensive experience helping individuals discover their creative potential and bring their ideas to life, Linda shares her knowledge on our platform. Her goal is to empower readers with practical tips, inspiring ideas, and step-by-step strategies for success in the world of creative hobbies.